Susan reporting:
After the number of interesting comments following my
post on 18th c. stays last week, I made the question of stay-lacing one of my top priorities for my quickie trip to
Colonial Williamsburg this week. The majority of women employees who are wearing historic dress are also wearing stays (the ones without stays are representing women of the past who would not ordinarily wear them, such as enslaved African American women and Native American women.)
Most said that they had a friend, sister, spouse, boyfriend, or co-worker who helped them lace and tie their stays in the morning – which, really, must have been the case for most 18th c. women as well. But there were a few hardy souls who said they could and did put their stays on by themselves, and that, with a little practice, it wasn't that difficult. Abby Cox, a costume scholar and currently a seamstress in CW's Costume Design Center, volunteered to show how it's done.
Click on the photographs to enlarge them for detail.
A few words about Abby's stays,
top: Replicating the style of the 1770s, the stays are made of lavender worsted wool over layers of linen, and edged with narrow strips of white kidskin. Abby stitched the stays herself entirely by hand, aiming for a hand-stitch gauge of 10 stitches per inch. This is no casual undertaking: Abby estimates that stitching the rows of narrow channels took about nine days, while shaping the bones and fitting them into the channels took another two days of work. Eighteenth century women would not have attempted to make their own stays, but instead would purchase bespoke stays from a skilled stay-maker (almost always male), who would have made nothing else.

First Abby lay her stays out on a table and laced them very loosely, using a bone bodkin (a large-eyed needle) to draw the lace – a cord much like a shoelace – through the eyelets. 18th c. stays are spiral-laced, meaning that the lace goes from side to side in a zig-zag pattern. With a servant or other helper to draw the stays tight, the lacing would begin with a looped knot at the bottom and go upward, fastening at the top. Solo-lacing must go the opposite direction, with the beginning knot at the top eyelet.
Once Abby had the lace through all the eyelets, she slipped the stays over her head and over her shift, and settled them in place,
above right. Then, reaching around behind, she gradually began pulling the lace tight,
above left. The goal with 18th c stays is about an inch or two gap. The edges are not intended to meet, so as you can see, Abby did an admirable job, working by feel. When she reached the bottom, she pulled the lace tight, and wrapped it several times around her waist before securing it with a bow,
lower right. Yes, Abby made it look easy,
lower left, but this was clearly a process that required practice as well as flexibility!
Why didn't women wear front-lacing stays, which would have been so much more simple? Tradition, and fashion: back-lacing created a smoother, flatter front that was the ideal. The majority of surviving 18th c. stays are back-laced, though there are a handful that lace in front, designed to please some forgotten independent ladies.
Many thanks to Abby Cox for serving as my 18th c. lady, and to Angela Burnley of Burnley & Trowbridge for sharing her expertise and hospitality.
Photographs copyright ©2011 Susan Holloway Scott


 One of us --
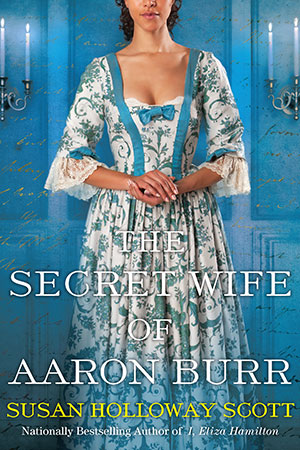


22 comments:
Thank you for a great tutorial on one of the potentially most frustrating pursuits in history. No wonder the Victorians introduced hooks and eyes.
That's a fun post, though it makes my chest hurt just looking at it. I can see that, busty as I am, I'd have needed some very good bespoke stays and a gentle maid...
Ooh, this will com n handy, since the people who would lace me are either somewhere else or can't physically do it.
Thank you so, so much :) !
I love reading historical romances so I loved reading about how the stays are put on. (complete with pictures) thank you
I have to laugh now when I read about a Duke trying to "quickly" help a lady dress after a rendezvous. He would have to be an experienced man for sure. lol
Cheers and well done.
MichelleKCanada
Hi Abby! *Waves* The new stays look lovely! Thanks for showing your self-lacing method--I think I'll stick with making friends help me :P My favorite lacing trick, by the by, is getting out of, rahter than into, stays easily--a slip knot with the "rip cord" tucked under the binding makes getting out of stays on your own easy, which is very helpful at the end of late nights!
All I have to say is WOW! I'd have bet $100 you couldn't do that. I've certainly never seen any of the re-enactors I know attempt it, LOL!
If Abby is around, I'd love permission to add this demonstration to the workshop I teach on historic clothing for RWA.
As a former corset maker I have to stick up for the poor corset. Please don't tie your laces around your waist. The laces rub in against the stays and cause necessary ware to the fabric at the stress points. It's an odd thing many re-enactors and costume dramas perpetuate but which seems to have very little historical accuracy. If you are having trouble getting the knot tight you can open a door and loop your laces around the two handles and lean forward.
HI Rowenna! :D
And Thanks everybody!
----
I just want to add, that with the pattern with these stays, they are meant to be laced up by someone else. The pattern was cut in a very specific way to fit my figure, and if they are not in the exact right position, the stays don't get the proper lace up (as you can see here with how they meet at the top). I usually have to hold the stays in place until they're snug enough to stay where they are supposed to. Also, looking back, I think it would be much easier to do this if I had shoulder straps on my stays, to help keep them in their proper position. I think I would have made the cord shorter and just laced myself half way, put the stays on and continued lacing myself behind my back. So that way I wouldn't have yards and yards of bulky cord around my waist. :)
(Hi Susan! :D)
Great informative post, especially the pictures! I love how you two always come up with such interesting topics, and explain them too. I understand so much more about antique corsets after seeing this.
Some of us at Old World Wisconsin also use this method, but Anonymous is correct. Tying the laces around your waist does provide awful wear to your corset. It also can detract from the silhouette of your outfit. Part of the reason that it does cause so much wear to the fabric is due to the fact many of the readily available fabrics we use are of inferior quality as the quality of our cotton fabrics diminish.
I'm so impressed by the 10-stitch per inch gauge! What an undertaking to produce such a lovely garment!
The stays are gorgeous! I need new 18th century stays. *sigh* More importantly, I need the time to make them.
I did my Regency ones entirely by hand (nowhere near as much stitching!) and I love 'em to pieces. They're on loan for a photoshoot for Carolyn Jewel right now. Really hope they worked out for her.
Utterly fascinating, and thank you to Anonymous and AnneMarieD for their informative comments. I'm a bit unclear on the worsted, though. The words worsted and 10 st per inch make me think knitting, but it doesn't llok like a knit fabric (and I wouldn't think knit would work as well as a woven fabric. The 1-st/inch is the sewing gauge, right?
Great comments - I love that I learn things from y'all, too! Special thanks to Abby for stopping by, too. :)
For more info about how Abby made her stays, check out her own blog: http://stay-ingalive.blogspot.com/search/label/Stays
And also the Burnleigh & Trowbridge FB page showing photos from their recent stay-making workshop, taught by Colonial Williamsburg tailor Mark Hutter:
http://www.facebook.com/media/set/?set=a.10150165140616713.287867.286101116712
Vivian, textile terms do get confusing. "Worsted" refers to the actual thread/yarn: a tightly spun wool thread that's sturdy and non-fuzzy. Since you sound like a fellow-knitter *g*, think of the difference between knitting worsted and, say, a loosely spun yarn like Lopi or Brown Sheep.
So a worsted wool fabric is woven from worsted wool thread, which makes it a smooth finished, sturdy cloth. If you click on the top photo of the stays on the table, it will enlarge, and you'll be able to see the weave.
Great blog! Both the Burnleys and Abby are very knowledgable, and very willing to share their knowledge. Love the purple wool. And for the corset maker, I myself have never wrapped my stay strings around my waist, but rather, tucked the loose string in between my shift and stays. I have enough layers around my waist!
Thank you for the explanation of worsted cloth vs worsted yarn. Makes perfect sense.
Hmmm, could I be doing too much knitting? ;)
Love this post so much...particularly because you know there were a ton of women historically who did this themselves. Fabulous! Thanks!
That's rather fascinating - I'd wondered sometimes how a woman might do up her stays by herself. After all...I doubt everyone had someone to help them with the job.
I'm impressed. I've tried to do that before and only got a wonky, too-loose, spiralling-out-of-whack lacing and a horrible stitch in my side, for my troubles. Professional living-history folks are amazing!
The most outrageous thing I've read in a historical romance was a scottish laird saying "Okay". Very period accurate...
I am a volunteer living history interpreter. I have had to learn to lace myself in my fully boned 1770s era stays since I didn't always have someone to help me. (I made them by hand myself). I loosely lace partway down from the top, wiggle into them, and then use a bodkin to lace behind my back. I learned to achieve a uniform one inch gap. I wrap the extra length of the lace into a loose bundle and push it up between my stays and my shift.
I was able to do this until past age 60, and I am not a slender or flexible woman. It takes time and practice, but gets to be a fairly rapid routine.
Both my sister and daughter require help lacing their stays and I feel sorry for them. When dressing, they have to wait the convenience of a helper, instead of dressing at their own pace. I think the independence is worth the effort to learn how to do it.
Only a badly torn rotator cuff forced me to go to front lacing stays. (They also lace in back, so front opening can be tightly laced shut daily, and back opening adjusted to fit as needed before putting them on.) Due to short time frames, I had to purchase premade stays. They are fine considering the price I paid, but I miss my custom fitted stays!
I wonder if anyone has documentation of sde lacing stays? They would perhaps retain the smooth front while allowing easier self lacing.
Post a Comment